The EditLive! IWCM integration is packaged as a standard JEE EAR file.To install the EditLive! integration you can use either the IBM Integrated Solutions Console or your own installation process. The documentation below outlines how to perform an installation using the WebSphere Application Server.
Step 1 - Install the EAR file
The server running WebSphere_Portal needs to be started before you begin the install process.
Load up your web browser and login to the WebSphere Application Server. This is a sperate service running on your webserver. The port for this will vary based on your server and WebSphere Portal version. In a standard installation the url for the console will be: WebSphere Application Server 6.1 https://server:9043/ibm/console
After logging in to the console, you will be able to install the application following the process below.
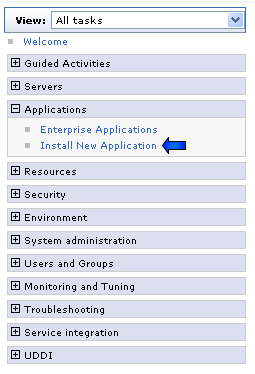
- Navigate to the Install New Application in the console. This will involve clicking on the "Install New Application" link as seen in Figure 1.

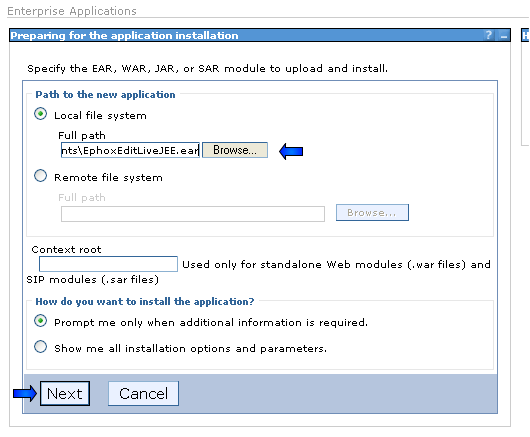
- From the "Choose Application" form, choose the new version of the EphoxEditLiveJEE.ear file, then click on "Next".

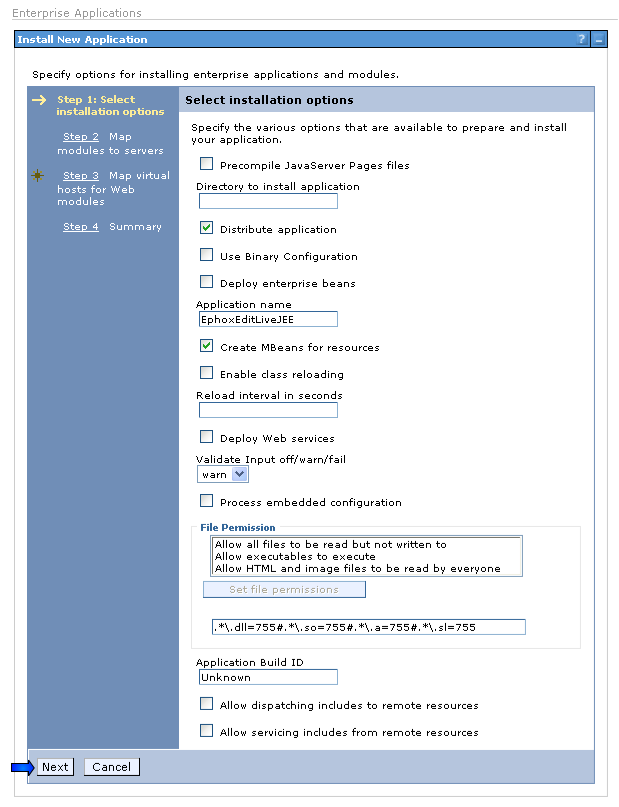
- You now will begin the wizard for installing a new application. The EAR file has had been packaged to run well with as many default options as possible.
- In the first step the defaults are all suitable. Simply click the "Next" button.

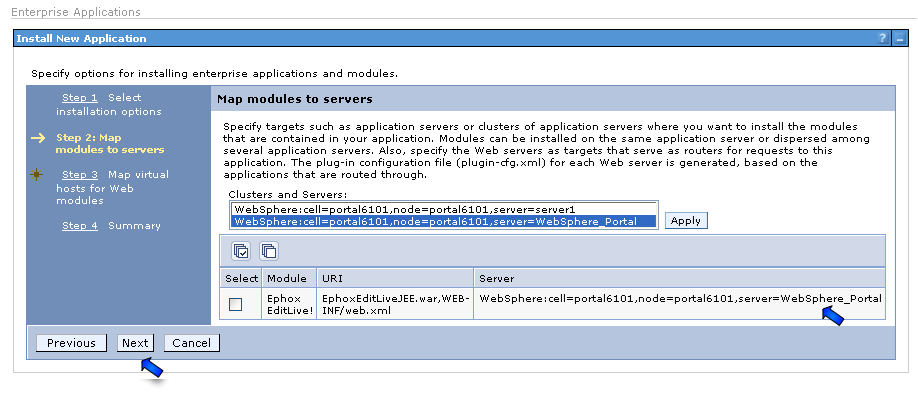
- In step 2 you will need to ensure that the modules are deployed to the server running WebSphere Portal. Typically this will be the server called "WebSphere_Portal". If this server does not appear in the list, it may not have been started yet. To ensure that the ear is deployed to the right location, you will need to select the server, select the module, and then click the "Apply" button.
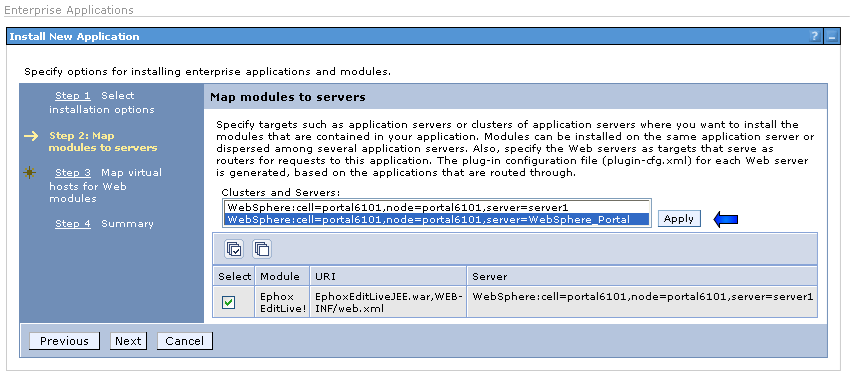
After doing this, you will expect the server section to look as per the following figure. You can then press the "Next" button to go to step 3.

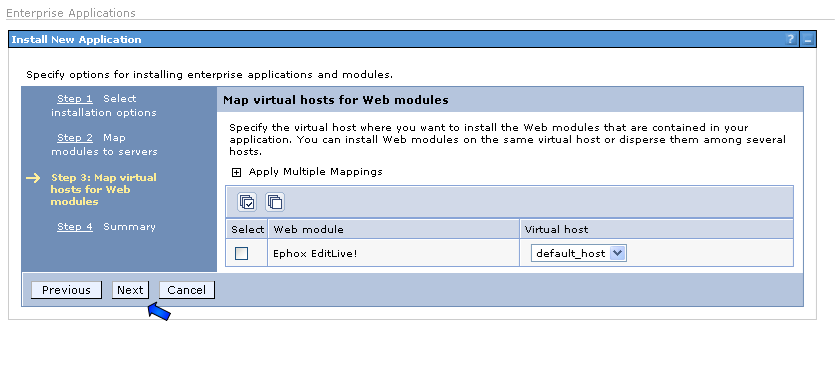
- The default options in Step 3 should be suitable, so you will typically be able to click the "Next" button and continue the wizard.

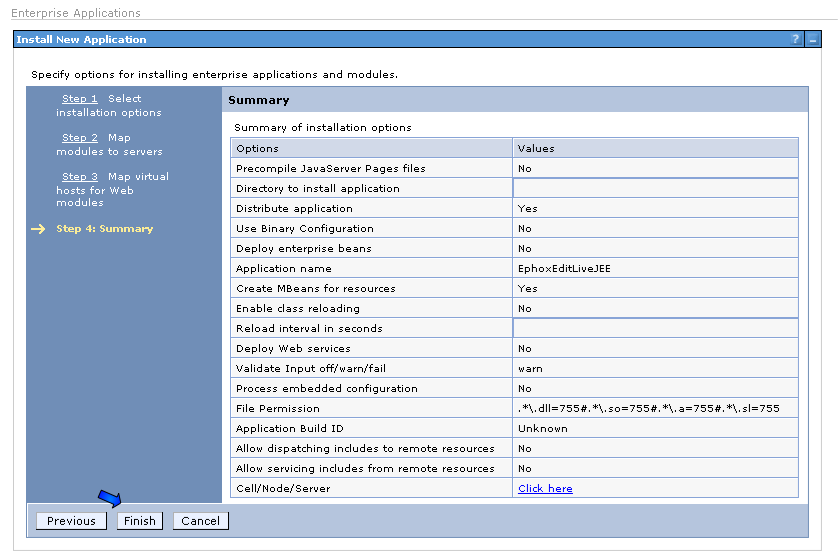
- In step 4 you are presented with a summary. After confirming the details, click "Finish" to complete the installation.
- In the first step the defaults are all suitable. Simply click the "Next" button.
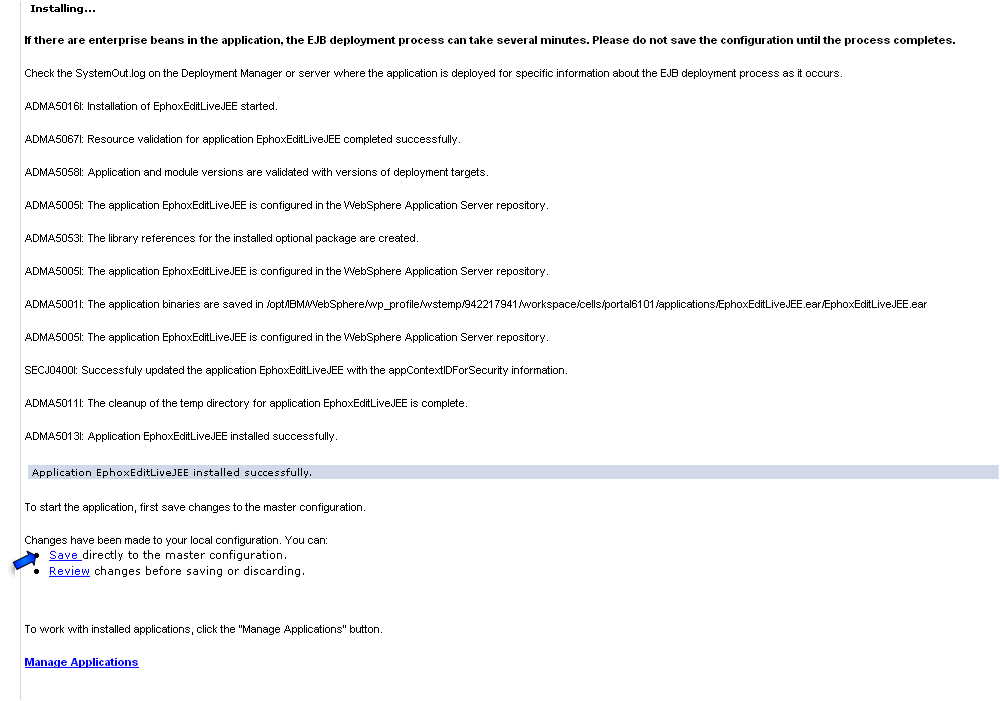
- After finishing the wizard, the installation will take place, presenting the following in your browser. To ensure that the changes are applied correctly, you will need to save the configuration to the master configuration. Click the "Save" link as indicated in Figure 8.
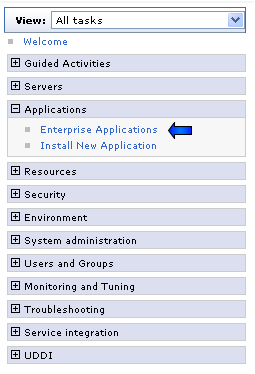
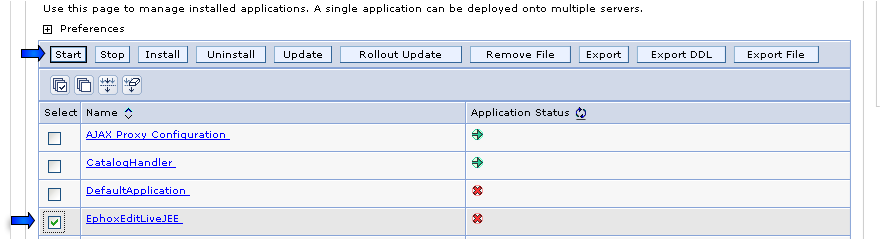
- After installing the application you will need to start it up. This can be done via the manage applications screen. First navigate to the manage applications screen, clicking the link indicated in Figure 9.
Then select the EphoxEditLiveJEE application as per Figure 10, and click the "Start" link.

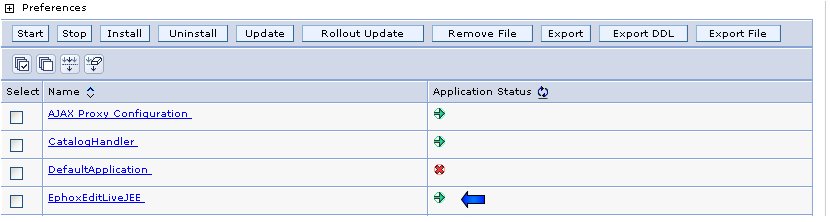
After starting the application you will see the application status now has a green arrow.

Step 2 - Specify the EditLiveJavaEditor.jsp File in WCM
- Log into Websphere Portal as a user with administrative WCM permissions.
- Navigate to the Web Content Management Authoring Portlet.
- Click the Configure link (nearby the Help link).
- Expand the Rich Text Options section.
- Select Custom Editor from the drop-down.
- In the text field displayed, enter /editlive/;jsp/html/EditLiveJavaEditor.jsp (The semi-colon is not a typo).
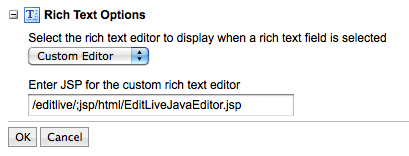
- Click OK.
If you haven't clicked the Configure link for WCM before, this may cause the current default Library associated with the WCM portlet to be removed. To reassign the default Library assign to the WCM portlet, expand the Library tab inside the Configure page, select Web Content, and click the Add button.
Client-Side Requirements
The EditLive! Client-Side Requirements can be found in the Install Guide of this documentation.
Although EditLive! itself supports a variety of JRE versions, WCM itself only supports a subset of the available JRE versions. Visit the WCM 6.1 Information Center for an up to date list of the JRE versions supported by WCM.