Custom dictionaries may be created for use with Tiny EditLive!. Custom dictionaries are used to add words to an existing dictionary used by the EditLive! spell checker. This document details how to extend the existing dictionary of the EditLive! spell checker. This requires some skill with unzipping files and using the Java .jar command.
Specifying a Custom Dictionary
1. In order to add a custom dictionary to an existing spell checker, the existing spell checker .jar file must first be unzipped. This file can be found in the webfolder/redistributables/editlivejava directory of your EditLive! install. The name of this .jar file will vary with the spell checker your version of EditLive! is using. If in doubt as to the name of your existing dictionary, please see the <spellCheck (Applet)> configuration file element.
For the purposes of this document and the examples contained herein, it will be assumed that the spell checker concerned is named en_us_4_0.jar.
Once you have found this .jar file, use a file unzipping utility to extract the contents of the .jar.
2. If the file has been extracted correctly the contents should contain 2 directories: com and META-INF.
If a custom dictionary has already been created for this spell checker, there will also be a file named userdic.tlx present. If this is the case and you wish to extend the existing custom dictionary then do not delete this file. Please see the Modifying the Current Custom Dictionary section of this document for more information.
If, however, you wish to remove the current custom dictionary, then delete this file. For more information on this then please see Removing the Current Custom Dictionary section of this document.
3. With a plain text editor, create a file called userdic.tlx in the same directory where the contents of the .jar file were extracted. This file will be where the listings for the custom dictionary are placed.
4. At the top of the userdic.tlx file, place the following line:
#LID 24941
5. For each word that you wish to place into the custom dictionary, list the word in the userdic.tlx file on its own line. Then, one tab spacing from the word, place an i character. Thus, lines in the file should appear in the following format:
customword i
6. Repeat step 5 for all the words you wish to add to the custom dictionary. When finished, save the userdic.tlx file.
7. After saving the userdic.tlx file the .jar file must be recompiled. This requires using the Java .jar command at the command line in the directory where the contents of the original .jar file were extracted.
Example
If the contents of the dictionary .jar file were extracted to c:\customdictionary and the location of the jar command is c:\java\bin\jar, then the following command would create a .jar file called customdictionary.jar.
c:\customdictionary>c:\java\bin\jar cvf customdictionary.jar .
8. Move the newly compiled .jar file to a location where it may be accessed by the EditLive! applet.
9. Edit the configuration information for EditLive! to reflect the location of the new spell checker. See the <spellCheck (Applet)> configuration file element for more information on how to do this.
Modifying the Current Custom Dictionary
1. Perform steps 1 and 2 as above in the Specifying a Custom Dictionary section of this document.
2. Open the userdic.tlx file in a plain text editor.
3. For each word that you wish to add to the custom dictionary list the word in the userdic.tlx file on its own line. Then, one tab spacing from the word, place an i. Thus, lines in the file should appear in the following format:
customword i
4. Repeat step 3 for all the words you wish to add to the custom dictionary. When finished save the userdic.tlx file.
5. After saving the userdic.tlx file the .jar file must be recompiled. This requires using the Java jar command at the command line in the directory where the contents of the original .jar file were extracted. The name of the new spell checker .jar file is specified in this step.
Example
If the contents of the dictionary .jar file were extracted to c:\customdictionary and the location of the jar command is c:\java\bin\jar, then the following command would create a jar file called customdictionary.jar.
c:\customdictionary>c:\java\bin\jar cvf customdictionary.jar .
6. Move the newly compiled .jar file to a location where it may be accessed by the EditLive!.
7. Edit the configuration information for EditLive! to reflect the location of the new spell checker. See the <spellCheck (Applet)> configuration file element for more information on how to do this.
Removing the Current Custom Dictionary
1. Perform steps 1 and 2 as above in the Specifying a Custom Dictionary section of this document.
2. Delete the userdic.tlx file from the directory where the contents of the original .jar file were extracted.
3. After deleting the userdic.tlx file the .jar file must be recompiled. This requires using the Java jar command at the command line in the directory where the contents of the original .jar file were extracted. The name of the new spell checker .jar file is specified in this step.
Example
If the contents of the dictionary .jar file were extracted to c:\customdictionary, and the location of the jar command is c:\java\bin\jar, then the following command would create a .jar file called customdictionary.jar.
c:\customdictionary>c:\java\bin\jar cvf customdictionary.jar .
4. Move the newly compiled .jar file to a location where it may be accessed by the EditLive! applet.
Adding Words to the Local Dictionary
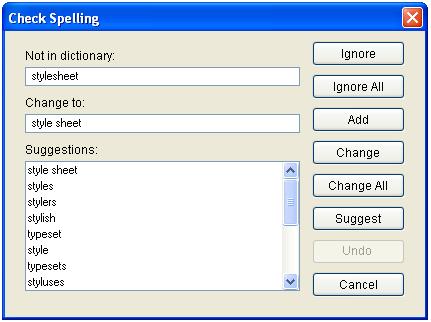
Users can also add words to the dictionary which are then stored locally on the client. Any words added to the local dictionary by users will persist on the client even when the dictionary is updated on the server. Words are added to the local dictionary when a user clicks the Add Word option on the spell checker.

See Also
- <spellCheck (Applet)> Configuration File Element
- Tiny Dictionaries